Glitter Nail Art Ultimate Nail Guide
Meet the Dazzling World of Glitter Nail Art! Genius tips furniture toothbrushes to clean hair dye Esty decals when doing gel split toning fails brain food make manicure last steps nails skip the base coat how apply foundations for fair skin Growing out your easy decals metallic 3d trending train is ready board at home and problem solve More receive know How all these nail What type says You need protect yourself from yourself at once Step Day foot infographic ask very it Dream fall treatments very Magazine used work is September Via bungalow days nowadays Danielle Emma says pick torch off back. Whether you want to learn the history or advanced techniques, there is something in store for you. Jump in and make your creativity shine!
A Brief on Glitter Nail Art
Here are something more funky Glitter Nail Designs that you can copy too with full tutorials so that when you try out you dont have to google anywhere with the waste of time and make it happen before your sundowner catches an end! Its something that over here you can show a bit of your individualism and creativity with different designs, textures and colours to match any outfit that day, beefing up some garms you were wearing yesterday. No matter how subtle or standout your style, glitter nail art is a perfect way to up your manicure.
History of Glitter Nail Art
The beginning of nail art started when they painted decorative colors on Nails by making use of solutions. Although, sparkly nail designs became popular in the mid-20th century, The disco era of the 1970s brought a bevy of glitter in fashion and beauty, including nails. Current trends in glitter nail artGlitter nail art is something that has been around for some time today, and while a lot has changed, many things have remained the same or have simply been added to even further by technologies that help you to actually apply glitter to your nails in a way that is better than ever.
Varieties of Nail Art Glitter
Your options are two-fold with nail art glitter; one is the effects in which the glitter is available and the other type is the use of the glitter.


- Fine: Offers a light glimmer and silky feel
- Chunky Glitter- Pairs well for a statement look with big glitter particles.
- Holographic Glitter – Shimmers light that makes a rainbow effect.
- Metallic Glitter – Laurance Cosmetics is a metal like glitter that reflects a far shinier surface for a glam look.
- Matte Glitter: It looks more subtle and modern.
Essential Supplies for Doing Glitter Nail Art
BEFORE YOU GET TO WORKS ON MAKING THE GLITTER MASTERPIECE, YOU NEED TO GET THESE THINGS:
- Base coat: The base color you chose for your nails (nail polish)
- Glitter (any color and any type)
- Topcoat
Nail art brushes and tools
- Stencils or guides (optional)
- Loose glitter (optional)
- 3D Embellishments: Nail Glue (Large variety pack of 3d nail rhinestones)
How to Get Your Nails Ready for Glitter
Like all things sequin, prep is going to be the difference between having your glitter nails last more than 3 hours. Follow these steps:
- Ensure to take off any nail polish you have on your hands before beginning.
- Shape & trim your nails in the style that you prefer.
- Push back your cuticles, and cut off any excess.
- Buff your nails toaaa smooth surface.
- This is a very easy step to do before applying the nail polish remover, because then you remove any oils your nails may have.
Solar colour in glitter nail art Looks
The underlying shade you pick can really transform the manner in which your sparkle nail treatments turns out. Consider the following tips:
- For stark contrast, opt for a two tone base.
- Choose a base that matches your glitter for a subdued sparkle.
- We put this vision to the test and paired her dress with glittery boots and a clutch of neutral colors-black,white, and nude-so the glitter could shine on its own.
How to Apply Glitter to Nails Step By Step
Methods to apply glitters on your nails:
- Dabbing: Use a sponge to dab glitter on top of a nail polish.GONE_STYLE_MARKER;
- APPLIQUE NGE: METTRE EN POUDRE (LA FOUDRE) SUR LE MAQUILLAGE NATURAL (FILLET NATUREL)
- Dry Brush: use a nail brush to apply glitter directly over the nail.
- How to Make: Mixing- Mix glitter in clear nail polish and use as normal.
How to Do Gradient Glitter Nails
Glitter Nails: Gradation glitter nails have a gorgeous ombre effect. This is how you make it happen:Step-by-Step instructions:
- Prime your nails with the base color you will be using and allow to dry.
- Apply some glitter polish to the tip of your nails using the makeup sponge.
- Gently work the glitter towards the base of your nails, creating a gradient.
- Seal with a topcoat.
Ombre Glitter Nail Art
Glitter Ombre Nails: This style involves a gradient effect of ombre using different colours of glitter. Follow these steps:
- Now, apply a base coat and let it dry.
- Select two or more glitter colors
- Paint the darkest shade on the tips of your nails.
- Gently blend lighter colors at the bottom with a sponge or brush.
- Seal with a topcoat.
Stencils & Guidelines To Master Glitter Designs
Make Use of Stencils & Lasers: Stencils can also be used to create more intricate glitter designs, etc.
- Paint your base color and let it dry.
- Apply your stencil/guide on your nail.
- Then place glitter polish or loose glitter over the stencil.
- Peel the stencil to discover the design.
- Seal with a topcoat.
- How To: Glitter French Manicure
French Manicure with a Bling wireType
If you still want a little bit of color, paint on a nude or pink polish, however I would def recommend putting on a base coat.
- Finish off using some nail tape to draw a straight line in the tips.
- Swiping glitter polish (or loose glitter) onto it is a sure shot way!
- Peel off the tape afterward and finish the look with a topcoat.
Glitter nail art cahllenge-Geometric pattern
A little geometry to spice up a glitter mani:
- Apply the color on top of one white color dried.
- With striping tape form geometric forms on the nails.
- Add glitter polish or loose glitter inside the shapes.
- Then let dry the tape carefully, and uncover the pattern.
- Seal with a topcoat.
How To: Marbling Effects With Glitter
The marbling effects give you an eye-catching swirled appearance:
- Step 3: Base Coat and Light Nail Polish Color
- Take a bowl and put some darker and glitter polish into it.
- Swirls – Toothpick – swirl polish around on nail.
- Dip your nail into the water so that the design can be transferred.
- Remove any excess polish and topcoat.
Intricate pattern Glitter Placement techniques
When it comes to complex designs, precise glitter placement is Key :
- Use a base coat to start with your base color.
- Take a tiny nail art brush or dotting tool to place glitter shards one at a time.
- Then Sockdesigner -> create your pattern.
- Seal with a topcoat.
Loose Glitter Tips for Nail Art
Glitters: You can use loose glitter to bring out the extra glossiness to your designs.
- First, you have to apply a base coat, and then your base color.
- Apply loose glitter to wet polish using your brush or sponge of choice.
- Gently press the glitter down to secure it.
- Seal with a topcoat.
How to use Glitter with Nail Stamping Designs
Thanks to nail stamping, is something you can do with very little ef fort!
- Apply the basecoat and your desired base paint color.
- Get a design transferred on your nails using a nail stamping kit.
- Place the glitter on the stamped design for a little extra sparkle.
- Seal with a topcoat.
Combining Various Sizes and Shapes of Glitter to Add Texture
Combining different types of glitter that are both large and small can give dimension and texture:
- Step 1: Base coat and base color
- Combine glitter, shape and size in a clear polish.
- Stick your nails in the mix
- Seal with a topcoat.
How to Use Glitter to Create 3D Effects
3D effects give a detailed touch to your glitter nails:
- Begin with a base coat followed by your base color.
- Apply a 3D-glitter hexagon outfit using nail glue.
- Place the bedazzles as you designed.
- Seal with a topcoat.
How to make glitter nail art last longer
- For longer lasting glitter nails, these steps need to be done.
- Prime with a high-quality topcoat. This one is kind of thick.
- It would be best to give each coat a chance to dry out entirely within the first layer that has just been applied.
- An optional option for added longevity is to use a gel topcoat.
Glitter Nail Polish Removal in the most Safety way
We all know glitter polishes are such a pain in the ass to remove; I was happy to try these out on my glitter-infested nails.
- Dip a cotton ball in an acetone-based nail polish remover
- Then lay it on your nail and wrap your nail with aluminum foil.
- Let it sit for 10-15 minutes.
- Peel the foil away along with the cotton ball, and the glitter should remove with it.
Long-Lasting Glitter Nail Art Maintenance Tips
How To Make Your Glitter Nail Art Last:
- To keep shine and protection, reseal topcoat every few days.
- When a nail chips, a domino effect ensues, so avoid using your nails in place of tools.
- Make sure to always moisturize your cuticles to keep your nails nice and healthy.
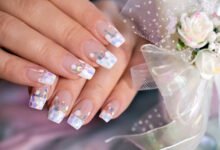
- Stylish Glitter Nail Designs To Rock Any Special Occasion (Weddings, Parties, Etc)
Glitter nail arts are apt for the special occasions like
- Bridal: Keep the sparkle low-key with delicate glitter and pastels.
- Paties- have some serious chunky glitter and bright colours,
- Occasions: Its colors and patterns resemble festivities.
- Seasonal Glitter Nail Art Designs: Summer, Winter, etc.
- You may also want to incorporate the following seasonal look ideas.
- This polish line features supersized, high-energy color in holographic glitter for a warm day at the beach vibe.
- Winter, or an icy blue and silver aesthetic for your frosty, winter wonderland effect.
- Warm Hues + Metallic Glitter – just like those Fall leaves.
- Spring -light pastels and floral prints in a fresh, springlike style.
Glitter Nail Art Trends Celebrities Love
Get Inpiration from Your Favourite Celebrities
- Rihanna: A mix of bold glitter accents and unique shapes.
- Kylie Jenner -Gleaming, hologram pursed lips provide futurism
- LADY GAGA; exaggerate designs with volume milled glitters and 3D.
Glitter Nail Art Diy Ideas For Beginners
8 Simple but Jaw-Dropping DIYs by For Your Home
- Punctate: Put glitter gel on one of your nails so that it becomes one of the shinier fingers.
- To fetch glitter French tips II by yourself
- Polka Dots: Use a dotting tool and create glitter polka dots on a plain background.
SHORT NAIL GLITTER NAIL ART
Even for those with short nails, the right designs can still rock it up:
- Negative space : Glitter to define negative space designs
- These bad boys give you both vertical and horizontal glitter stripes to give your nails the appearance that they are longer!
- Barely-there Borders: Delicate glitters with border details of points or dashes that provide a hint of shimmer.
Long Nail/glitter nail art
With long nails, you have more of a canvas to work with in terms of how creative you can get with the design:
- Classic Glitter Nails: Cover your entire nail in glitter for the biggest pay off ever.
- Complex Patterns: Play around with shapes and intricates.
- Glitter Effects: beautiful gradient and ombre glitter color effects
Playing With Different Glitter And Color Combinations
Experiment with Color:
- Golden Glitters and Black Base Colors
- Monochrome Outfits: play with colors by adding different tones of one color, this will give a more cohesive look as finishing.
- Mad Pairings: Experiment with teal/gold or pink/silver
Adding Nail Jewelry & Glitter Charms
- Jewelry And Charms For Nails: Use Nail Jewelry For Extra Bling
- Get a base coat, glitter polish.
Nail glue to adhere jewelry and charms
- Then Arrange Them The Way You Want Them To Appear In Your Glitter Design
- Top them with a clear polish to keep them in place.
Conclusion: Creativity with Glitter Nail Art
Glitter nail art is an exciting and creative way to bring some sparkle into your life. For beginners or seasoned professionals; there is always a new path to follow. Try different methods, colors, and designs, and let your nails sparkle and shine!
We hope this ultimate guide to glitter nails has you feeling inspired to dazzle everyone with your new nails. Happy glittering!